Tuesday, January 11, 2022

Adding VmWare Worker Node to OpenShift Cluster the BareMetal IPI Way


In a previous blog I discussed how one could provide Intelligent Platform Management Interface (IPMI) capabilities to a VmWare virtual machine.  I also eluded to being able to deploy OpenShift Baremetal IPI on VmWare virtual machines given the IPMI requirement was met for the purpose of a non production lab scenario.   However since I do not have enough lab equipment to run a full blown VmWare ESXi with enough virtual machines to mimic an OpenShift Baremetal IPI deployment, I will do the next best thing and demonstrate how to add a VmWare virtual machine acting as an OpenShift worker using the scale up capability.

Before we get started though lets review the lab setup for this exercise.   The diagram below shows that we have a 3 master cluster on a RHEL KVM hypervisor node.  These nodes while virtual are using VBMC to enable IPMI and hence the cluster was deployed as a OpenShift Baremetal IPI cluster.   We have an additional worker we would like to add that resides on an ESXi hypervisor host.   Using the virtualbmcforvsphere container (discussed in a previous blog) we can mimic IPMI for that worker node and thus treat it like a baremetal node.

Now that we have an understanding of the lab layout lets get to adding the additional VmWare worker node to our cluster.   The first step is to create the vmware-bmh.yaml which will contain the secret information for the IPMI credentials base64 encoded and the baremetal host information:

$ cat << EOF > ~/vmware-bmh.yaml
---
apiVersion: v1
kind: Secret
metadata:
  name: worker-4-bmc-secret
type: Opaque
data:
  username: YWRtaW4=
  password: cGFzc3dvcmQ=
---
apiVersion: metal3.io/v1alpha1
kind: BareMetalHost
metadata:
  name: worker-4
spec:
  online: true
  bootMACAddress: 00:50:56:83:da:a1
  bmc:
    address: ipmi://192.168.0.10:6801
    credentialsName: worker-4-bmc-secret
EOF

Once we have created the vmware-bmh.yaml file we can go ahead and create the resources with the oc command below:

$ oc create -f vmware-bmh.yaml -n openshift-machine-api
secret/worker-4-bmc-secret created
baremetalhost.metal3.io/worker-4 created	

Once the command is executed this will kick off the process of registering the node in ironic, turning the node on via IPMI and then inspecting the node to determine its resource properties.  The video below will show what is happening on the console of the worker node during this process:


Besides watching from the console, we can also run some oc commands to see the status of the worker node during this process as well:

$ oc get baremetalhosts -n openshift-machine-api
NAME       STATE                    CONSUMER               ONLINE   ERROR
master-0   externally provisioned   kni20-cmq65-master-0   true     
master-1   externally provisioned   kni20-cmq65-master-1   true     
master-2   externally provisioned   kni20-cmq65-master-2   true     
worker-4   registering                                     true 
$ oc get baremetalhosts -n openshift-machine-api
NAME       STATE                    CONSUMER               ONLINE   ERROR
master-0   externally provisioned   kni20-cmq65-master-0   true     
master-1   externally provisioned   kni20-cmq65-master-1   true     
master-2   externally provisioned   kni20-cmq65-master-2   true     
worker-4   inspecting                                      true     

$ oc get baremetalhosts -n openshift-machine-api
NAME       STATE                    CONSUMER               ONLINE   ERROR
master-0   externally provisioned   kni20-cmq65-master-0   true     
master-1   externally provisioned   kni20-cmq65-master-1   true     
master-2   externally provisioned   kni20-cmq65-master-2   true     
worker-4   match profile                                   true     

$ oc get baremetalhosts -n openshift-machine-api
NAME       STATE                    CONSUMER               ONLINE   ERROR
master-0   externally provisioned   kni20-cmq65-master-0   true     
master-1   externally provisioned   kni20-cmq65-master-1   true     
master-2   externally provisioned   kni20-cmq65-master-2   true     
worker-4   ready                                           true  

Once the process is complete the new worker node will be marked ready and left powered on.  Now we can move onto scaling up the cluster.   To do this we first need to find the name of the machineset which in this case is kni20-cmq65-worker-0.  With that information we can then scale up the node count from 0 to 1 and this will trigger the provisioning process:

$ oc -n openshift-machine-api get machineset
NAME                   DESIRED   CURRENT   READY   AVAILABLE   AGE
kni20-cmq65-worker-0   0         0                             17h

$ oc -n openshift-machine-api scale machineset kni20-cmq65-worker-0 --replicas=1
machineset.machine.openshift.io/kni20-cmq65-worker-0 scaled

The video below will show what happens during the scaling process from the worker nodes console point of view.  In summary what will happen is the node will turn on, an RHCOS image will get written, the node will reboot, the ostree will get updated, the node will reboot again and finally the services to enable the node to join the cluster will start:


Besides watching from the console of the worker node we can also following along at the cli with the oc command to show the state of the worker node:

$ oc get baremetalhosts -n openshift-machine-api
NAME       STATE                    CONSUMER                     ONLINE   ERROR
master-0   externally provisioned   kni20-cmq65-master-0         true     
master-1   externally provisioned   kni20-cmq65-master-1         true     
master-2   externally provisioned   kni20-cmq65-master-2         true     
worker-4   provisioning             kni20-cmq65-worker-0-lhd92   true 

And again using the oc command we can see the worker node has been provisioned:

$ oc get baremetalhosts -n openshift-machine-api
NAME       STATE                    CONSUMER                     ONLINE   ERROR
master-0   externally provisioned   kni20-cmq65-master-0         true     
master-1   externally provisioned   kni20-cmq65-master-1         true     
master-2   externally provisioned   kni20-cmq65-master-2         true     
worker-4   provisioned              kni20-cmq65-worker-0-lhd92   true 

Once the worker node has shown provisioned and the node has rebooted the second time, we can then follow the status of the worker node with the oc get nodes command: 

$ oc get nodes
NAME                             STATUS     ROLES           AGE   VERSION
master-0.kni20.schmaustech.com   Ready      master,worker   17h   v1.22.0-rc.0+a44d0f0
master-1.kni20.schmaustech.com   Ready      master,worker   17h   v1.22.0-rc.0+a44d0f0
master-2.kni20.schmaustech.com   Ready      master,worker   17h   v1.22.0-rc.0+a44d0f0
worker-4.kni20.schmaustech.com   NotReady   worker          39s   v1.22.0-rc.0+a44d0f0

Finally after the scaling process is completed and the worker node should display that it is ready and joined to the cluster:

$ oc get nodes
NAME                             STATUS   ROLES           AGE   VERSION
master-0.kni20.schmaustech.com   Ready    master,worker   17h   v1.22.0-rc.0+a44d0f0
master-1.kni20.schmaustech.com   Ready    master,worker   17h   v1.22.0-rc.0+a44d0f0
master-2.kni20.schmaustech.com   Ready    master,worker   17h   v1.22.0-rc.0+a44d0f0
worker-4.kni20.schmaustech.com   Ready    worker          58s   v1.22.0-rc.0+a44d0f0

Hopefully this provides a good example of how to use VmWare virtual machines to simulate baremetal nodes for OpenShift IPI deployments.

Thursday, January 06, 2022

BareMetal IPI OpenShift Lab on VmWare?


I see a lot of customers asking about being able to deploy an OpenShift Baremetal IPI lab or proof of concepts in VmWare.  Many want to do it to try out the deployment method without having to invest in the physical hardware.   The problem faced with VmWare is the lack of an Intelligent Platform Management Interface (IPMI) for the virtual machines.   I am not knocking VmWare either in this case because they do offer a robust API via Vcenter that lets one do quite a bit via scripting for automation.  However the OpenShift Baremetal IPI install process requires IPMI or RedFish which are standards on server hardware.  There does exist though a project that can possibly fill this gap though but it should only be used for labs and proof of concepts not production.

The project that solves this issue is called virtualbmc-for-vsphere.  If the name virtualbmc sounds familiar its because that project was originally designed to provide IPMI to KVM virtual machines.  However this forked version of virtualbmc-for-vsphere uses the same concepts to provide an IPMI interface for VmWare virtual machines.  Only the code knows how to talk to Vcenter to power on/of and set bootdevices  of the virtual machines.  Here are some example of what IPMI commands are supported:

# Power the virtual machine on, off, graceful off, reset, and NMI. Note that NMI is currently experimental
ipmitool -I lanplus -U admin -P password -H 192.168.0.1 -p 6230 power on|off|soft|reset|diag

# Check the power status
ipmitool -I lanplus -U admin -P password -H 192.168.0.1 -p 6230 power status

# Set the boot device to network, disk or cdrom
ipmitool -I lanplus -U admin -P password -H 192.168.0.1 -p 6230 chassis bootdev pxe|disk|cdrom

# Get the current boot device
ipmitool -I lanplus -U admin -P password -H 192.168.0.1 -p 6230 chassis bootparam get 5

# Get the channel info. Note that its output is always a dummy, not actual information.
ipmitool -I lanplus -U admin -P password -H 192.168.0.1 -p 6230 channel info

# Get the network info. Note that its output is always a dummy, not actual information.
ipmitool -I lanplus -U admin -P password -H 192.168.0.1 -p 6230 lan print 1

From the commands above it looks like we get all the bits that are required from an IPMI standpoint when doing a OpenShift BareMetal IPI deployment.  

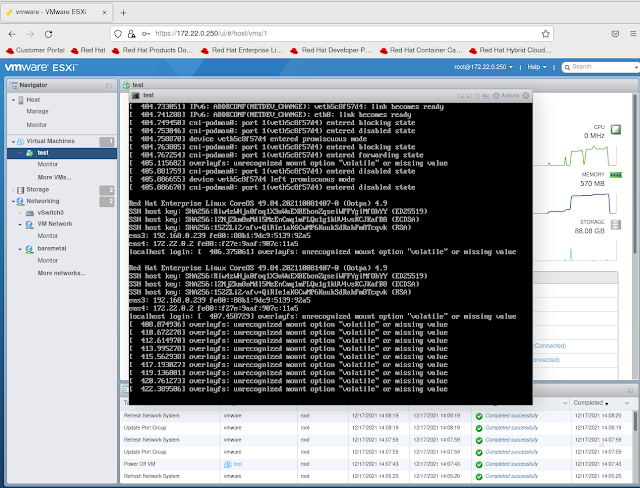
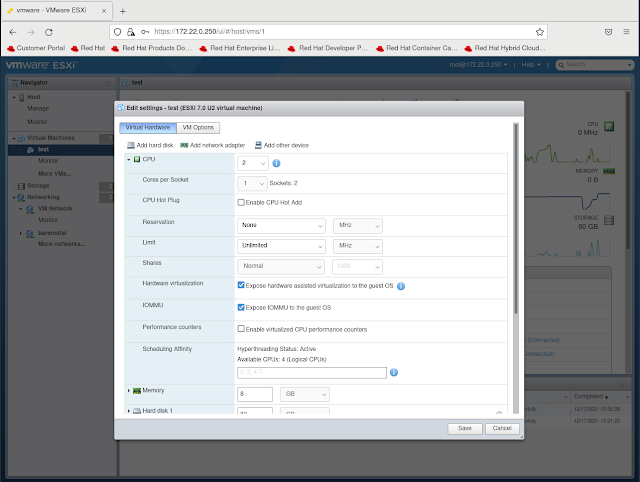
Before I proceed to show how to setup virtualbmc-for-vsphere lets quick look at our test virtual machine within Vcenter (vcenter.schmaustech.com).   From the picture below we can see that there is a virtual machine called rheltest which is currently powered on and has an ipaddress of 192.168.0.226.  Once we get virtualbmc-for-vsphere configured we will use IPMI commands to power down the host and then power it back up.


Now that we have familiarized ourself with the VmWare environment lets take a moment to setup virtualbmc-for-vsphere.   There are one of two methods for installation: using pip (more information can be found here) and running via a container.   In this discussion I will be using the container method since that is more portable for me and easier to stand up and remove from my lab environment.  The first thing we need to do is pull the image:

# podman pull ghcr.io/kurokobo/vbmc4vsphere:0.0.4
Trying to pull ghcr.io/kurokobo/vbmc4vsphere:0.0.4...
Getting image source signatures
Copying blob 7a5d07f2fd13 done  
Copying blob 25a245937421 done  
Copying blob 2606867e5cc9 done  
Copying blob 385bb58d08e6 done  
Copying blob ab14b629693d done  
Copying blob bf5952930446 done  
Copying config 789cdc97ba done  
Writing manifest to image destination
Storing signatures
789cdc97ba7461f673cc7ffc8395339f38869abb679ebd0703c2837f493062db

With the image pulled we need to start the container with the following syntax below.  I should note that the -p option can be specified more then once using different port numbers.  Each of the port numbers will then in turn be used for a virtual machine running in VmWare.

# podman run -d --name vbmc4vsphere -p "6801:6801/udp" -v vbmc-volume:/vbmc/.vbmc ghcr.io/kurokobo/vbmc4vsphere:0.0.4
ddf82bfdb7899e9232462ae3e8ea821d327b0db1bc8501c3827644aad9830736
# podman ps
CONTAINER ID  IMAGE                                 COMMAND               CREATED        STATUS            PORTS                   NAMES
ddf82bfdb789  ghcr.io/kurokobo/vbmc4vsphere:0.0.4   --foreground          3 seconds ago  Up 3 seconds ago  0.0.0.0:6801->6801/udp  vbmc4vsphere

Now that the vbmc4vsphere container is running lets go ahead and get a bash shell within the container:

# podman exec -it vbmc4vsphere /bin/bash
root@ddf82bfdb789:/# 

Inside the container we will go ahead and use the vbmc command to add our rheltest virtual machine.  For this command to work we need to specify the port that will be listening (should be one of the ports specified with the -p option at container run time), a IPMI username and password, the vcenter username and password and the vcenter hostname or ipaddress:

root@ddf82bfdb789:/# vbmc add rheltest --port 6801 --username admin --password password --viserver 192.168.0.30 --viserver-password vcenterpassword --viserver-username administrator@vsphere.local
root@ddf82bfdb789:/# vbmc list
+----------+--------+---------+------+
| VM name  | Status | Address | Port |
+----------+--------+---------+------+
| rheltest | down   | ::      | 6801 |
+----------+--------+---------+------+
root@ddf82bfdb789:/# 

Once the entry is created we need to start it so its listening for incoming IPMI requests:

root@ddf82bfdb789:/# vbmc start rheltest
root@ddf82bfdb789:/# vbmc list
+----------+---------+---------+------+
| VM name  | Status  | Address | Port |
+----------+---------+---------+------+
| rheltest | running | ::      | 6801 |
+----------+---------+---------+------+
root@ddf82bfdb789:/# exit
exit
#

Now lets grab the ipaddress off the host where the virtualbmc-for-vsphere container is running.   We need this value when we specify the host in our IPMI command:

# ip addr show dev ens3
2: ens3: <ltBROADCAST,MULTICAST,UP,LOWER_UP>gt mtu 1500 qdisc fq_codel state UP group default qlen 1000
    link/ether 52:54:00:b9:97:58 brd ff:ff:ff:ff:ff:ff
    inet 192.168.0.10/24 brd 192.168.0.255 scope global noprefixroute ens3
       valid_lft forever preferred_lft forever
    inet6 fe80::6baa:4a96:db6b:88ee/64 scope link noprefixroute 
       valid_lft forever preferred_lft forever

Now let test if we can see the power status of our rheltest host with ipmitool.  We know in our previous screenshot that it was on.  I will also run a ping to show the host is up and reachable.

# ipmitool -I lanplus -U admin -P password -H 192.168.0.10 -p 6801 power status
Chassis Power is on

# ping 192.168.0.226 -c 4
PING 192.168.0.226 (192.168.0.226) 56(84) bytes of data.
64 bytes from 192.168.0.226: icmp_seq=1 ttl=64 time=0.753 ms
64 bytes from 192.168.0.226: icmp_seq=2 ttl=64 time=0.736 ms
64 bytes from 192.168.0.226: icmp_seq=3 ttl=64 time=0.651 ms
64 bytes from 192.168.0.226: icmp_seq=4 ttl=64 time=0.849 ms

--- 192.168.0.226 ping statistics ---
4 packets transmitted, 4 received, 0% packet loss, time 3109ms
rtt min/avg/max/mdev = 0.651/0.747/0.849/0.072 ms


So we confirmed the host is up so lets go ahead and power it off:

# ipmitool -I lanplus -U admin -P password -H 192.168.0.10 -p 6801 power off
Chassis Power Control: Down/Off

Now lets check with ipmitool and see if the status is also marked as off and if it responds to a ping:

# ipmitool -I lanplus -U admin -P password -H 192.168.0.10 -p 6801 power status
Chassis Power is off

# ping 192.168.0.226 -c 4 -t 10
PING 192.168.0.226 (192.168.0.226) 56(84) bytes of data.
From 192.168.0.10 icmp_seq=1 Destination Host Unreachable
From 192.168.0.10 icmp_seq=2 Destination Host Unreachable
From 192.168.0.10 icmp_seq=3 Destination Host Unreachable
From 192.168.0.10 icmp_seq=4 Destination Host Unreachable

--- 192.168.0.226 ping statistics ---
4 packets transmitted, 0 received, +4 errors, 100% packet loss, time 3099ms
pipe 4

Looks like the host is off and no longer responding which is what we expected.  From the Vcenter console we can see rheltest has also been powered off.   I should note that since we are using the VmWare API's under the covers in virtualbmc-for-vsphere the shutdown task also got recorded in Vcenter under recent tasks.


Lets go ahead and power rheltest back on with the ipmitool command:

# ipmitool -I lanplus -U admin -P password -H 192.168.0.10 -p 6801 power on
Chassis Power Control: Up/On

We can again use ipmitool to validate the power status and ping to validate the connectivity:

# ipmitool -I lanplus -U admin -P password -H 192.168.0.10 -p 6801 power status
Chassis Power is on

# ping 192.168.0.226 -c 4
PING 192.168.0.226 (192.168.0.226) 56(84) bytes of data.
64 bytes from 192.168.0.226: icmp_seq=1 ttl=64 time=0.860 ms
64 bytes from 192.168.0.226: icmp_seq=2 ttl=64 time=1.53 ms
64 bytes from 192.168.0.226: icmp_seq=3 ttl=64 time=0.743 ms
64 bytes from 192.168.0.226: icmp_seq=4 ttl=64 time=0.776 ms

--- 192.168.0.226 ping statistics ---
4 packets transmitted, 4 received, 0% packet loss, time 3066ms
rtt min/avg/max/mdev = 0.743/0.976/1.528/0.323 ms

Looks like rheltest is back up again and reachable. The Vcenter console also shows that rheltest has been powered on again:


Now that we understand how virtualbmc-for-vsphere works it would be rather easy to configure an OpenShift BareMetal IPI lab inside of VmWare.   While I will not go into the details here there are additional blogs I have written around the requirements for doing a baremetal IPI deployment and those should be no different in this scenario now that we have the IPMI requirement met in VmWare.

Tuesday, January 04, 2022

Using VMware for OpenShift BM IPI Provisioning


Anyone who has looked at the installation requirements for an OpenShift Baremetal IPI installation knows that a provisioning node is required for the deployment process.   This node could potentially be another physical server or a virtual machine, either way though it needs to be a node running Red Hat Enterprise Linux 8.   The most common example is where a customer would just use one of their clusters physical nodes, install RHEL 8 on it, deploy OpenShift and then reincorporate that node into the newly built cluster as a worker.   I myself have personally used a provisioning node that is virtualized on kvm/libvirt with RHEL 8 host.  In this example the deployment process, specifically the bootstrap virtual machine, is then nested.   With that said though I am seeing a lot of requests from customers that want to leverage a virtual machine in VMware to handle the provisioning duties, especially since after the provisioning process, there really is not a need to keep that node around. 

While it is entirely possible to use a VMware virtual machine as the provisioning node there are some specific things that need to be configured to ensure that the nested bootstrap virtual machine can launch properly and obtain the correct networking to function and deploy the OpenShift cluster.  The following attempts to highlight those requirements without providing a step by step installation guide since I have written about the OpenShift BM IPI process many times before.

First lets quickly take a look at the architecture of the provisioning virtual machine on VMware.  The following figure show a simple ESXi 7.x host (Intel NUC) with a single interface into it that has multiple trunked vlans from a Cisco 3750.

From the Cisco 3750 we can see the switch port is configured to allow the trunking of the two vlans we will need to be present on the provisioning virtual machine running on the ESXi hypervisor host.   The first vlan is vlan 40 which is the provisioning network used for PXE booting the cluster nodes.  Note that this vlan needs to also be our native vlan because PXE does not know about vlan tags.   The second vlan is vlan 10 which provides access for the baremetal network and for this one it can be tagged as such.  Other vlans are trunked to these ports but they are not needed for this particular configuration and are only there for flexibility when I create virtual machines for other lab testing.

!
interface GigabitEthernet1/0/6
 switchport trunk encapsulation dot1q
 switchport trunk native vlan 40
 switchport trunk allowed vlan 10,20,30,40,50
 switchport mode trunk
 spanning-tree portfast trunk
!

Now lets login to the VMware console and look at our networks from the ESXi point of view.   Below we can see that I have three networks: VM Network, baremetal and Management Network.   The VM Network is my provisioning network or native vlan 0 in the diagram above and provides the PXE boot network required for BM IPI deployment when using PXE.  Its also the network that gives me access to this ESXi host.   The baremetal network is the vlan 10 network and will provide the baremetal access for the bootstrap VM when it runs nested in my provisioning node.


If we look at the baremetal network for example we can see that the security policies for promiscuous mode, forged transmits and MAC changes are all set to yes.   By default VMware has these set to no but they need to be enabled like I have in order for the bootstrap VM that will be run nested on our virtual provisioning node to get a baremetal ipaddress from DHCP.


To change this setting I just needed to edit the port group and select the accept radio buttons for those three options and then save it:


After the baremetal network has been configured correctly I went ahead and made the same changes to the VM Network which again is my provisioning network:


Now that I have made the required network configurations I can go ahead and create my provisioning node virtual machine in VMware.   However we need to make sure that the VM is created to pass the hardware virtualization through to the VM.  Doing so ensure we will be able to launch a bootstrap VM nested inside the provisioning node when we go to do the baremetal IPI deployment.   Below is a screenshot where that configuration setting needs to be made.  The fields for Hardware Virtualization and IOMMU need to be checked:


With the hardware virtualization enabled we can go ahead and install Red Hat Enterprise Linux 8 on the virtual machine just like we would for the baremetal IPI deployment requirements.

Once we have RHEL 8 installed we can further validate that the virtual machine in VMware is configured appropriately for us to run a nested VM inside by executing the following command:

$ virt-host-validate 
  QEMU: Checking for hardware virtualization                                 : PASS
  QEMU: Checking if device /dev/kvm exists                                   : PASS
  QEMU: Checking if device /dev/kvm is accessible                            : PASS
  QEMU: Checking if device /dev/vhost-net exists                             : PASS
  QEMU: Checking if device /dev/net/tun exists                               : PASS
  QEMU: Checking for cgroup 'cpu' controller support                         : PASS
  QEMU: Checking for cgroup 'cpuacct' controller support                     : PASS
  QEMU: Checking for cgroup 'cpuset' controller support                      : PASS
  QEMU: Checking for cgroup 'memory' controller support                      : PASS
  QEMU: Checking for cgroup 'devices' controller support                     : PASS
  QEMU: Checking for cgroup 'blkio' controller support                       : PASS
  QEMU: Checking for device assignment IOMMU support                         : WARN (No ACPI DMAR table found, IOMMU either disabled in BIOS or not supported by this hardware platform)
  QEMU: Checking for secure guest support                                    : WARN (Unknown if this platform has Secure Guest support)

If everything passing (the last two warning are okay) then one is ready to continue to do a baremetal IPI deployment using the virtual machine as a provisioning node in VMware.