Tuesday, January 04, 2022

Using VMware for OpenShift BM IPI Provisioning


Anyone who has looked at the installation requirements for an OpenShift Baremetal IPI installation knows that a provisioning node is required for the deployment process.   This node could potentially be another physical server or a virtual machine, either way though it needs to be a node running Red Hat Enterprise Linux 8.   The most common example is where a customer would just use one of their clusters physical nodes, install RHEL 8 on it, deploy OpenShift and then reincorporate that node into the newly built cluster as a worker.   I myself have personally used a provisioning node that is virtualized on kvm/libvirt with RHEL 8 host.  In this example the deployment process, specifically the bootstrap virtual machine, is then nested.   With that said though I am seeing a lot of requests from customers that want to leverage a virtual machine in VMware to handle the provisioning duties, especially since after the provisioning process, there really is not a need to keep that node around. 

While it is entirely possible to use a VMware virtual machine as the provisioning node there are some specific things that need to be configured to ensure that the nested bootstrap virtual machine can launch properly and obtain the correct networking to function and deploy the OpenShift cluster.  The following attempts to highlight those requirements without providing a step by step installation guide since I have written about the OpenShift BM IPI process many times before.

First lets quickly take a look at the architecture of the provisioning virtual machine on VMware.  The following figure show a simple ESXi 7.x host (Intel NUC) with a single interface into it that has multiple trunked vlans from a Cisco 3750.

From the Cisco 3750 we can see the switch port is configured to allow the trunking of the two vlans we will need to be present on the provisioning virtual machine running on the ESXi hypervisor host.   The first vlan is vlan 40 which is the provisioning network used for PXE booting the cluster nodes.  Note that this vlan needs to also be our native vlan because PXE does not know about vlan tags.   The second vlan is vlan 10 which provides access for the baremetal network and for this one it can be tagged as such.  Other vlans are trunked to these ports but they are not needed for this particular configuration and are only there for flexibility when I create virtual machines for other lab testing.

!
interface GigabitEthernet1/0/6
 switchport trunk encapsulation dot1q
 switchport trunk native vlan 40
 switchport trunk allowed vlan 10,20,30,40,50
 switchport mode trunk
 spanning-tree portfast trunk
!

Now lets login to the VMware console and look at our networks from the ESXi point of view.   Below we can see that I have three networks: VM Network, baremetal and Management Network.   The VM Network is my provisioning network or native vlan 0 in the diagram above and provides the PXE boot network required for BM IPI deployment when using PXE.  Its also the network that gives me access to this ESXi host.   The baremetal network is the vlan 10 network and will provide the baremetal access for the bootstrap VM when it runs nested in my provisioning node.


If we look at the baremetal network for example we can see that the security policies for promiscuous mode, forged transmits and MAC changes are all set to yes.   By default VMware has these set to no but they need to be enabled like I have in order for the bootstrap VM that will be run nested on our virtual provisioning node to get a baremetal ipaddress from DHCP.


To change this setting I just needed to edit the port group and select the accept radio buttons for those three options and then save it:


After the baremetal network has been configured correctly I went ahead and made the same changes to the VM Network which again is my provisioning network:


Now that I have made the required network configurations I can go ahead and create my provisioning node virtual machine in VMware.   However we need to make sure that the VM is created to pass the hardware virtualization through to the VM.  Doing so ensure we will be able to launch a bootstrap VM nested inside the provisioning node when we go to do the baremetal IPI deployment.   Below is a screenshot where that configuration setting needs to be made.  The fields for Hardware Virtualization and IOMMU need to be checked:


With the hardware virtualization enabled we can go ahead and install Red Hat Enterprise Linux 8 on the virtual machine just like we would for the baremetal IPI deployment requirements.

Once we have RHEL 8 installed we can further validate that the virtual machine in VMware is configured appropriately for us to run a nested VM inside by executing the following command:

$ virt-host-validate 
  QEMU: Checking for hardware virtualization                                 : PASS
  QEMU: Checking if device /dev/kvm exists                                   : PASS
  QEMU: Checking if device /dev/kvm is accessible                            : PASS
  QEMU: Checking if device /dev/vhost-net exists                             : PASS
  QEMU: Checking if device /dev/net/tun exists                               : PASS
  QEMU: Checking for cgroup 'cpu' controller support                         : PASS
  QEMU: Checking for cgroup 'cpuacct' controller support                     : PASS
  QEMU: Checking for cgroup 'cpuset' controller support                      : PASS
  QEMU: Checking for cgroup 'memory' controller support                      : PASS
  QEMU: Checking for cgroup 'devices' controller support                     : PASS
  QEMU: Checking for cgroup 'blkio' controller support                       : PASS
  QEMU: Checking for device assignment IOMMU support                         : WARN (No ACPI DMAR table found, IOMMU either disabled in BIOS or not supported by this hardware platform)
  QEMU: Checking for secure guest support                                    : WARN (Unknown if this platform has Secure Guest support)

If everything passing (the last two warning are okay) then one is ready to continue to do a baremetal IPI deployment using the virtual machine as a provisioning node in VMware.

Friday, December 31, 2021

Alternate Appliance Troubleshooting


Normally I would not document about an appliance problem.  After all I have replaced quite a few components across a wide array of appliances including a stop clutch in a Whirlpool washing machine.  However this latest experience was one that I felt needed better documentation given that the symptoms can sometimes be confused with those of other components and one might replace those first which can lead to a lot of extra cost without results.  Before we dive into the symptoms and fix though, lets introduce the appliance in question.  In my case it was a Whirlpool Gold Series Dishwasher (WDF750SAYM3) however the following will most likely apply to any Whirlpool dishwasher.

The problem started a few months ago with a undissolved soap packet after a completed cycle.  I didn't think much of it and carried on.  However then on another cycle I never heard the water spraying inside the dishwasher.   The washer would fill and drain but never engage the spraying of the water to actually wash the dishes.   At this point I was starting to wonder what was going on so I did a little research and found how to do a diagnostic run cycle on the dishwasher.  This involved by pressing any 3 (three) keys in the 1-2-3-1-2-3-1-2-3 sequence except Start, Delay,  or Cancel  and making sure the delay between key presses is not more than 1 sec.  If a problem is found, the dishwasher may display an error code by flashing the clean button in two sequences.  The first sequence will flash the clean led multiple times and then pause and the second sequence will flash clean led multiple times.  By counting the flashes in both sequences I would get a two digit error code.  However upon running the diagnostics I only got a code showing the water was too cold which makes sense because the run from my hot water heater is quite far and unless I run the hot water at the sink the initial water will be cool. With the diagnostics not showing any issues I started to try to find an answer online.  Most of the information found though seemed to point to a bad spray pump or a controller board issue.   I did not think it was either of these those because on some days the dishwasher worked normally without any problems but then on other days it seemed more problematic.  That was when I stumbled across a post where it was indicated that on this particular model of Whirlpool dishwasher there was a bad latch design and the latch mechanism had no test in diagnostic mode.  I thought I might be onto something so I replaced the latch with a new redesigned part.  The dishwasher seemed to be working.

The success however was short lived and if anything I was seeing the pattern of failures starting to become more prevalent.  In observing the dishwasher I found that a run would fail if during the first fill the spraying action did not start before the water shutoff.  So I would hit Cancel and Start again and sometimes it would eventually work.   I also found that if the water was hot on the start the chances of a successful wash went up.  Again when the dishwasher would work it was just fine so I still was ruling out it was a spray pump issue or controller board issue.  If either were truly bad I would expect my dishes to come out dirty and when the dishwasher worked they were clean.

Again I went back to researching on the internet and came across a conversation about the turbidity sensor (sometimes referred to as OWI) in Whirlpool dishwashers.  So what does this sensor do?  As the soil level increases, the amount of transmitted light decreases. The turbidity sensor measures the amount of transmitted light to determine the turbidity of the wash water. These turbidity measurements are supplied to the dishwasher controller board, which makes decisions on how long to wash in all the cycles.  However this is only part of the story because this sensor also has a thermistor built into it as well which monitors water temperature.  The temperature monitoring is key because as I stated earlier my dishwasher seemed to have better success when the water was very hot coming into the dishwasher.

With my new found information I proceeded to test my turbidity sensor.  With the power supply to the dishwasher turned off, the turbidity sensor can be tested from the main controller board at the connection P12 from the wire at pin 1 to the wire at pin 3. The resistance should measure between 46KO to 52KO at room temperature.  My resistance however was not in specification so I knew I found the source of my problem.

I went ahead and ordered my replacement sensor and when it arrived I used the following video to guide me through replacing the sensor:


Once the sensor was replaced I needed to run another diagnostic since that is what Whirlpool recommends when replacing the turbidity sensor.  Once that was complete I tested out the dishwasher over the course of a few days running multiple loads per day.   Every cycle was successful so I could finally declare success.   I should note however that when I was replacing the sensor I noticed my water supply line was corroded and slightly leaking but I will save that story for another day.


Friday, December 17, 2021

ETCD: Where is my Memory?


A colleague recently approached me about some cyclical etcd memory usage on their OpenShift clusters.  The pattern appeared to be a “sawtooth” or “run and jump” pattern when looking at the etcd memory utilization graphs.  The pattern happened every two hours where over the course of the two hours memory usage would gradually increase and then roughly at the two hour mark would abruptly drop back down to a more baseline level before repeating.  My colleague wanted to understand why this behavior was occurring and what was causing the memory to be freed.  In order to answer this question we first need to explore a little more about etcd and what things impact memory utilization and allow for free pages to be returned.


Etcd  can be summarized as a distributed key-value data store in OpenShift designed to be highly available and strongly consistent for distributed systems. OpenShift uses etcd to store all of its persistent cluster data, such as configs and metadata, allowing OpenShift services to remain scalable and stateless.

Etcd’s datastore is built on top of a fork of BoltDB called BBoltDB. Bolt is a key-value store that writes its data into a single memory mapped file which enables the underlying operating system to handle how data is cached and how much of the file remains in memory.   The underlying data structure for Bolt is B+ tree consisting of 4kb pages that are allocated as they are needed.  It should be noted that Bolt is very good with sequential writes but weak with random writes.  This will make more sense further in this discussion.


Along with Bolt in etcd is a protocol called Raft which is a consensus algorithm that is designed to be easy to understand and provide a way to distribute a state machine across a cluster of distributed systems.  Consensus, which involves a simple majority of servers agreeing on values, can be thought of as a highly available replication log between the nodes running etcd in the OpenShift cluster.  Raft works by electing a leader and then forcing all write requests to go to the leader.  Changes are then replicated from the leader to the other nodes in the etcd cluster.  If by chance the leader node goes offline due to maintenance or failure Raft will hold another election for a leader.


Etcds uses multiversion concurrency control (MVCC) in order to handle concurrent operations from different clients.  This ties into the Raft protocol as each version in MVCC relates to an index in the Raft log.  Etcd manages changes by revisions and thus every transaction made to etcd is a new revision.  By keeping a history of revisions, etcd is able to provide the version history for specific keys.  These keys are then in turn associated with their revision numbers along with their new values.  It's this key writing scheme that enabled etcd to make all writes sequential which reduces reliability on Bolts weakness above at random writes.

As we discussed above, etcd use of revisions and key history enables useful features for a key or set of keys.  However, etcds revisions can grow very large on a cluster and consume a lot of memory and disk.  Even if a large number of keys are deleted from the etcd cluster the space will continue to grow since the prior history for those keys will still exist.   This is where the concept of compaction comes into play.   Compaction in etcd will drop all previous revisions smaller than the revision being compacted to.   These compactions are just deletions in Bolt but they do remove keys from memory which will free up memory.   However if those keys have also been written to disk the disk will not be freed up until a defrag which can reclaim the space.

Circling back to my colleague's problem, I initially thought maybe a compaction job every two hours was the cause of his “sawtooth” graph of memory usage.  However it was confirmed that his compaction job was configured to run every 5 minutes.  This obviously did not correlate to the behavior we were seeing in the graphs.

Then I recalled, besides storing configs and metadata, etcd also stores events from the cluster.  These events would be stored just like we described above in key value pairs and would have revisions.  Although events would most likely never have new revisions because each event would be a unique key value pair.  Now every cluster event has an event-ttl assigned to it.  The event-ttl is just like one would imagine, a time to live before the event is removed or aged out.  The thought was maybe we had a persisting grouping of events happening that would age out over the time frame pattern we were seeing in the memory usage.  However upon investigating further we found the event-ttl was set to three hours.  Given our pattern was at a two hour scenario we abandoned looking any further at that option.

Then as I was looking through documentation about etcd I recalled that Raft with all of its responsibilities in etcd also does a form of compaction.  If we recall from above I indicated Raft has a log which contains indexes which just happens to be memory resident.   In etcd there is a configuration option called snapshot-count which controls the number of applied Raft entries to hold in memory before compaction executes.  In versions of etcd before v.3.2 that count was 10k but in v3.2 or greater the value has been set to 100k so ten times the amount of entries.  When the snapshot count on the leader server is reached the snapshot data is persisted to disk and then the old log is truncated.  If a slow follower requests logs before a compacted index is complete the leader will send a snapshot for the follower to just overwrite its state.   This was exactly the explanation for the behavior we were seeing.

Hopefully this walk through provided some details on how etcd works and how memory is impacted on a running cluster.  To read further on any of the topics feel free to explore these links:

Thursday, December 02, 2021

The Lowdown on Downward API in OpenShift


A customer approached me recently with a use case where they needed to have the OpenShift container know the hostname of the node it was running on.  They had found that the normal hostname file on Red Hat CoreOS was not on the node so they were not certain how they could derive the hostname value when they launched the custom daemonset they built.  Enter the downward API in OpenShift.

The downward API is a implementation that allows containers to consume information about API objects without integrating via the OpenShift API. Such information includes items like the pod’s name, namespace, and resource values. Containers can consume information from the downward API using environment variables or a volume file.

Lets go ahead and demonstrate the capabilities of the downward API with a simple example of how it can be used.  First lets create the following downward-secret.yaml file which will be used in our demonstration.  The secret file is just a basic secret nothing exciting:

$ cat << EOF > downward-secret.yaml
apiVersion: v1
kind: Secret
metadata:
  name: downwardsecret
data:
  password: cGFzc3dvcmQ=
  username: ZGV2ZWxvcGVy
type: kubernetes.io/basic-auth
EOF

Now lets create the secret on the OpenShift cluster:

$ oc create -f downward-secret.yaml
secret/downwardsecret created

Next lets create the following downward-pod.yaml file:

$ cat << EOF > downward-pod.yaml
apiVersion: v1
kind: Pod
metadata:
  name: downward-pod
spec:
  containers:
    - name: busybox-container
      image: k8s.gcr.io/busybox
      command: [ "sh", "-c"]
      args:
      - while true; do
          echo -en '\n';
          printenv NODENAME HOSTIP SERVICEACCT NAMESPACE;
          printenv DOWNWARD_SECRET;
          sleep 10;
        done;
      resources:
        requests:
          memory: "32Mi"
          cpu: "125m"
        limits:
          memory: "64Mi"
          cpu: "250m"
      volumeMounts:
        - name: downwardinfo
          mountPath: /etc/downwardinfo
          readOnly: false
          
      env:
        - name: NODENAME
          valueFrom:
            fieldRef:
              fieldPath: spec.nodeName
        - name: HOSTIP
          valueFrom:
            fieldRef:
              fieldPath: status.hostIP
        - name: SERVICEACCT
          valueFrom:
            fieldRef:
              fieldPath: spec.serviceAccountName
        - name: NAMESPACE
          valueFrom:
            fieldRef:
              fieldPath: metadata.namespace
        - name: DOWNWARD_SECRET
          valueFrom:
            secretKeyRef:
              name: downwardsecret
              key: username
  volumes:
    - name: downwardinfo
      downwardAPI:
        items:
          - path: "cpu_limit"
            resourceFieldRef:
              containerName: busybox-container
              resource: limits.cpu
          - path: "cpu_request"
            resourceFieldRef:
              containerName: busybox-container
              resource: requests.cpu
          - path: "mem_limit"
            resourceFieldRef:
              containerName: busybox-container
              resource: limits.memory
          - path: "mem_request"
            resourceFieldRef:
              containerName: busybox-container
              resource: requests.memory
EOF

Lets quickly take a look at the contents of that file which will create a pod called downward-pod and inside run a container called busybox-container using the busybox image:

$ cat downward-pod.yaml 
apiVersion: v1
kind: Pod
metadata:
  name: downward-pod
spec:
  containers:
    - name: busybox-container
      image: k8s.gcr.io/busybox
      command: [ "sh", "-c"]
      args:
      - while true; do
          echo -en '\n';
          printenv NODENAME HOSTIP SERVICEACCT NAMESPACE;
          printenv DOWNWARD_SECRET;
          sleep 10;
        done;
      resources:
        requests:
          memory: "32Mi"
          cpu: "125m"
        limits:
          memory: "64Mi"
          cpu: "250m"
      volumeMounts:
        - name: downwardinfo
          mountPath: /etc/downwardinfo
          readOnly: false
          
      env:
        - name: NODENAME
          valueFrom:
            fieldRef:
              fieldPath: spec.nodeName
        - name: HOSTIP
          valueFrom:
            fieldRef:
              fieldPath: status.hostIP
        - name: SERVICEACCT
          valueFrom:
            fieldRef:
              fieldPath: spec.serviceAccountName
        - name: NAMESPACE
          valueFrom:
            fieldRef:
              fieldPath: metadata.namespace
        - name: DOWNWARD_SECRET
          valueFrom:
            secretKeyRef:
              name: downwardsecret
              key: username
  volumes:
    - name: downwardinfo
      downwardAPI:
        items:
          - path: "cpu_limit"
            resourceFieldRef:
              containerName: busybox-container
              resource: limits.cpu
          - path: "cpu_request"
            resourceFieldRef:
              containerName: busybox-container
              resource: requests.cpu
          - path: "mem_limit"
            resourceFieldRef:
              containerName: busybox-container
              resource: limits.memory
          - path: "mem_request"
            resourceFieldRef:
              containerName: busybox-container
              resource: requests.memory


Under the container section we also defined some resources and added a volume mount. The volume mount will be used to mount up our downward api volume files which will consist of the resources we defined.  Those files will get mounted under the path /etc/downwardinfo inside the container:

      resources:
        requests:
          memory: "32Mi"
          cpu: "125m"
        limits:
          memory: "64Mi"
          cpu: "250m"
      volumeMounts:
        - name: downwardinfo
          mountPath: /etc/downwardinfo
          readOnly: false

Next there is a section where we defined some environment variables that reference some additional downward API values.  There is also a variable that references the downwardsecret.  All of these variables will get passed into the container to be consumed by whatever processes require them:

        env:
        - name: NODENAME
          valueFrom:
            fieldRef:
              fieldPath: spec.nodeName
        - name: HOSTIP
          valueFrom:
            fieldRef:
              fieldPath: status.hostIP
        - name: SERVICEACCT
          valueFrom:
            fieldRef:
              fieldPath: spec.serviceAccountName
        - name: NAMESPACE
          valueFrom:
            fieldRef:
              fieldPath: metadata.namespace
        - name: DOWNWARD_SECRET
          valueFrom:
            secretKeyRef:
              name: downwardsecret
              key: username

And finally there is a volumes section which defines the filename and the resource value field for the downwardinfo files that we want to pass into the container:

  volumes:
    - name: downwardinfo
      downwardAPI:
        items:
          - path: "cpu_limit"
            resourceFieldRef:
              containerName: busybox-container
              resource: limits.cpu
          - path: "cpu_request"
            resourceFieldRef:
              containerName: busybox-container
              resource: requests.cpu
          - path: "mem_limit"
            resourceFieldRef:
              containerName: busybox-container
              resource: limits.memory
          - path: "mem_request"
            resourceFieldRef:
              containerName: busybox-container
              resource: requests.memory


Now that we have an idea of what the downward-pod.yaml does lets go ahead and run the pod:

$ oc create -f downward-pod.yaml 
pod/downward-pod created
$ oc get pod
NAME           READY   STATUS    RESTARTS   AGE
downward-pod   1/1     Running   0          6s

With the pod running we can now validate that the downward API variables and volume files we set.  First lets just look at the pod log and see if the variables we defined and printed in our argument loop show the right values:

$ oc logs downward-pod

master-0.kni20.schmaustech.com
192.168.0.210
default
default
developer

master-0.kni20.schmaustech.com
192.168.0.210
default
default
developer


The variables look to be populated correctly with the right hostname, host IP address, namespace and serviceaccount.   Even the username for our secret is showing up correctly as developer.   Since that looks correct lets move on and execute a shell in the pod:

$ oc exec -it downward-pod sh
kubectl exec [POD] [COMMAND] is DEPRECATED and will be removed in a future version. Use kubectl exec [POD] -- [COMMAND] instead.
/ # 

Once inside lets print the environment out and see if our variables are listed there as well:

/ # printenv
KUBERNETES_PORT=tcp://172.30.0.1:443
KUBERNETES_SERVICE_PORT=443
HOSTNAME=downward-pod
SHLVL=1
HOME=/root
TERM=xterm
KUBERNETES_PORT_443_TCP_ADDR=172.30.0.1
PATH=/usr/local/sbin:/usr/local/bin:/usr/sbin:/usr/bin:/sbin:/bin
KUBERNETES_PORT_443_TCP_PORT=443
KUBERNETES_PORT_443_TCP_PROTO=tcp
HOSTIP=192.168.0.210
DOWNWARD_SECRET=developer
NAMESPACE=default
KUBERNETES_PORT_443_TCP=tcp://172.30.0.1:443
KUBERNETES_SERVICE_PORT_HTTPS=443
PWD=/
KUBERNETES_SERVICE_HOST=172.30.0.1
SERVICEACCT=default
NSS_SDB_USE_CACHE=no
NODENAME=master-0.kni20.schmaustech.com

Again the environment variables we defined are showing up and could be consumed by a process within the container. 

Now lets explore our volume files and confirm they too were set.   We can see the /etc/downwardinfo directory and four files exist:

/ # ls /etc/downwardinfo
cpu_limit    cpu_request  mem_limit    mem_request

Lets look at the contents of the four files:

/ # echo "$(cat /etc/downwardinfo/cpu_limit)"
1
/ # echo "$(cat /etc/downwardinfo/cpu_request)"
1
/ # echo "$(cat /etc/downwardinfo/mem_limit)"
67108864
/ # echo "$(cat /etc/downwardinfo/mem_request)"
33554432


The values in the files look correct and correspond to the resource values we defined in the downward-pod.yaml file that launched this pod.

At this point we have validated that the downward API does indeed provide information into the pod and can present itself either as an environment variable for a volume file.  So if anyone every asks how to get the hostname of the node the pod is running on as an environment variable inside the pod just keep the downward API in mind.

Thursday, October 28, 2021

Cluster Infrastructure Management with Red Hat Advanced Cluster Management for Kubernetes


In Red Hat Advanced Cluster Management for Kubernetes 2.4 there is a new component in technology preview called central infrastructure management.   This component allows a separate interface for an infrastructure administrator and a cluster creator.  From the infrastructure admin perspective it allows for management of on-premise compute resources across different data centers and/or locations.  Meanwhile once those compute resources have been identified it allows the cluster creators who might be part of a different Dev/Ops team to consume and allocate those resources for new OpenShift clusters.  The following video demonstrates a walk through on what that process looks like:


Monday, September 20, 2021

Deploy Single Node OpenShift via OpenShift Installer on Nvidia Jetson AGX


In a previous blog I walked through a disconnected single node OpenShift deployment using the OpenShift installer.   In this blog I will use a lot of the same steps but instead of installing on an X86 system we will try our hand at installing on a Nvidia Jetson AGX which contains an Arm processor.

Before we begin lets cover what this blog already assumes exists as prerequisites:
  • Podman, the oc binary and the openshift-install binary already exist on the system
  • A disconnected registry is already configured and has the mirrored aarch64 contents of the images for a given OpenShift release.   
  • A physical Nvidia Jetson AGX with UEFI firmware and the ability to boot an ISO image from USB
  • DNS entries for basic baremetal IPI requirements exist. My environment is below:
master-0.kni7.schmaustech.com IN A 192.168.0.47
*.apps.kni7.schmaustech.com IN A 192.168.0.47
api.kni7.schmaustech.com IN A 192.168.0.47
api-int.kni7.schmaustech.com   IN A 192.168.0.47

First lets verify the version of OpenShift we will be deploying by looking at the output of the oc version and openshift-install version:


$ oc version
Client Version: 4.9.0-rc.1
$ ./openshift-install version
./openshift-install 4.9.0-rc.1
built from commit 6b4296b0df51096b4ff03e4ec4aeedeead3425ab
release image quay.io/openshift-release-dev/ocp-release@sha256:2cce76f4dc2400d3c374f76ac0aa4e481579fce293e732f0b27775b7218f2c8d
release architecture amd64

While it looks like we will be deploying a version of 4.9.0-rc.1.  We technically will be deploying a version 4.9.0-rc.2 for aarch64.   We will set an image override for aarch64/4.9.0-rc2 a little further in our process.  Before that though, ensure the disconnected registry being used has the images for 4.9.0-rc.2 mirrored.  If not use a procedure like I have used in one of my previous blogs to mirror the 4.9.0-rc.2 images.

Now lets pull down a few files we will need for our deployment iso.   We need to pull down both the coreos-installer and the rhcos live iso:

$ wget https://mirror.openshift.com/pub/openshift-v4/clients/coreos-installer/v0.8.0-3/coreos-installer
--2021-09-16 10:10:26--  https://mirror.openshift.com/pub/openshift-v4/clients/coreos-installer/v0.8.0-3/coreos-installer
Resolving mirror.openshift.com (mirror.openshift.com)... 54.172.173.155, 54.173.18.88
Connecting to mirror.openshift.com (mirror.openshift.com)|54.172.173.155|:443... connected.
HTTP request sent, awaiting response... 200 OK
Length: 7649968 (7.3M)
Saving to: ‘coreos-installer’

coreos-installer                                     100%[=====================================================================================================================>]   7.29M  8.83MB/s    in 0.8s    

2021-09-16 10:10:27 (8.83 MB/s) - ‘coreos-installer’ saved [7649968/7649968]

$ wget https://mirror.openshift.com/pub/openshift-v4/aarch64/dependencies/rhcos/pre-release/4.9.0-rc.2/rhcos-live.aarch64.iso
--2021-09-16 10:10:40--  https://mirror.openshift.com/pub/openshift-v4/aarch64/dependencies/rhcos/pre-release/4.9.0-rc.2/rhcos-live.aarch64.iso
Resolving mirror.openshift.com (mirror.openshift.com)... 54.172.173.155, 54.173.18.88
Connecting to mirror.openshift.com (mirror.openshift.com)|54.172.173.155|:443... connected.
HTTP request sent, awaiting response... 200 OK
Length: 1031798784 (984M) [application/octet-stream]
Saving to: ‘rhcos-live.aarch64.iso’

rhcos-live.aarch64.iso                   100%[=====================================================================================================================>] 984.00M  11.2MB/s    in 93s     

2021-09-16 10:12:13 (10.6 MB/s) - ‘rhcos-live.aarch64.iso’ saved [1031798784/1031798784]


Set the execution bit on the coreos-installer which is a utility to embed the ignition file we will generate:

$ chmod 755 coreos-installer

Lets go ahead now and create an install-config.yaml for our single node deployment.  Notice some of the differences in this install-config.yaml.  Specifically we have no worker nodes defined, one master node defined and then we have the BootstrapInPlace section which tells us to use the nvme0n1 device in the node.  We also have our imageContentSources which tells the installer to use the local registry mirror I have already preconfigured.

$ cat << EOF > install-config.yaml
apiVersion: v1beta4
baseDomain: schmaustech.com
metadata:
  name: kni7
networking:
  networkType: OpenShiftSDN
  machineCIDR: 192.168.0.0/24
compute:
- name: worker
  replicas: 0
controlPlane:
  name: master
  replicas: 1
platform:
  none: {}
BootstrapInPlace:
  InstallationDisk: /dev/nvme0n1
pullSecret: '{ "auths": { "rhel8-ocp-auto.schmaustech.com:5000": {"auth": "ZHVtbXk6ZHVtbXk=","email": "bschmaus@schmaustech.com" } } }'
sshKey: 'ssh-rsa AAAAB3NzaC1yc2EAAAADAQABAAACAQDP+5QkRCiuhsYItXj7DzLcOIs2RbCgpMzDtPlt/hfLnDkLGozYIFapMp+o4l+6ornbZ3L+hYE0T8SyvyYVWfm1XpPcVgUIW6qp7yfEyTSRhpGnoY74PD33FIf6BtU2HoFLWjQcE6OrQOF0wijI3fgL0jSzvAxvYoXU/huMx/kI2jBcWEq5cADRfvpeYXhVEJLrIIOepoAZE1syaPT7jQEoLDfvxrDZPKObCOI2vzLiAQXI7gK1uc9YDb6IEA/4Ik4eV2R1+VCgKhgk5RUqn69+8a1o783g1tChKuLwA4K9lyEAbFBwlHMctfNOLeC1w+bYpDXH/3GydcYfq79/18dVd+xEUlzzC+2/qycWG36C1MxUZa2fXvSRWLnpkLcxtIes4MikFeIr3jkJlFUzITigzvFrKa2IKaJzQ53WsE++LVnKJfcFNLtWfdEOZMowG/KtgzSSac/iVEJRM2YTIJsQsqhhI4PTrqVlUy/NwcXOFfUF/NkF2deeUZ21Cdn+bKZDKtFu2x+ujyAWZKNq570YaFT3a4TrL6WmE9kdHnJOXYR61Tiq/1fU+y0fv1d0f1cYr4+mNRCGIZoQOgJraF7/YluLB23INkJgtbah/0t1xzSsQ59gzFhRlLkW9gQDekj2tOGJmZIuYCnTXGiqXHnri2yAPexgRiaFjoM3GCpsWw== bschmaus@bschmaus.remote.csb'
imageContentSources:
- mirrors:
  - rhel8-ocp-auto.schmaustech.com:5000/ocp4/openshift4
  source: quay.io/openshift-release-dev/ocp-release
- mirrors:
  - rhel8-ocp-auto.schmaustech.com:5000/ocp4/openshift4
  source: quay.io/openshift-release-dev/ocp-v4.0-art-dev
additionalTrustBundle: |
  -----BEGIN CERTIFICATE-----
  MIIF7zCCA9egAwIBAgIUeecEs+U5psgJ0aFgc4Q5dGVrAFcwDQYJKoZIhvcNAQEL
  BQAwgYYxCzAJBgNVBAYTAlVTMRYwFAYDVQQIDA1Ob3J0aENhcm9saW5hMRAwDgYD
  VQQHDAdSYWxlaWdoMRAwDgYDVQQKDAdSZWQgSGF0MRIwEAYDVQQLDAlNYXJrZXRp
  bmcxJzAlBgNVBAMMHnJoZWw4LW9jcC1hdXRvLnNjaG1hdXN0ZWNoLmNvbTAeFw0y
  MTA2MDkxMDM5MDZaFw0yMjA2MDkxMDM5MDZaMIGGMQswCQYDVQQGEwJVUzEWMBQG
  A1UECAwNTm9ydGhDYXJvbGluYTEQMA4GA1UEBwwHUmFsZWlnaDEQMA4GA1UECgwH
  UmVkIEhhdDESMBAGA1UECwwJTWFya2V0aW5nMScwJQYDVQQDDB5yaGVsOC1vY3At
  YXV0by5zY2htYXVzdGVjaC5jb20wggIiMA0GCSqGSIb3DQEBAQUAA4ICDwAwggIK
  AoICAQC9exAg3Ie3N3mkrQKseyri1VP2IPTc+pUEiVCPisIQAhRUfHhPR1HT7EF7
  SwaxrWjpfh9aYBPDEF3uLFQvzDEJWCh5PF55jwn3aABFGKEhfVBKd+es6nXnYaCS
  8CgLS2qM9x4WiuZxrntfB16JrjP+CrTvlAbE4DIMlDQLgh8+hDw9VPlbzY+MI+WC
  cYues1Ne+JZ5dZcKmCZ3zrVToPjreWZUuhSygci2xIQZxwWNmTvAgi+CAiQZS7VF
  RmKjj2H/o/d3I+XSS2261I8aXCAw4/3vaM9aci0eHeEhLIMrhv86WycOjcYL1Z6R
  n55diwDTSyrTo/B4zsQbmYUc8rP+pR2fyRJEGFVJ4ejcj2ZF5EbgUKupyU2gh/qt
  QeYtJ+6uAr9S5iQIcq9qvD9nhAtm3DnBb065X4jVPl2YL4zsbOS1gjoa6dRbFuvu
  f3SdsbQRF/YJWY/7j6cUaueCQOlXZRNhbQQHdIdBWFObw0QyyYtI831ue1MHPG0C
  nsAriPOkRzBBq+BPmS9CqcRDGqh+nd9m9UPVDoBshwaziSqaIK2hvfCAVb3BPJES
  CXKuIaP2IRzTjse58aAzsRW3W+4e/v9fwAOaE8nS7i+v8wrqcFgJ489HnVq+kRNc
  VImv5dBKg2frzXs1PpnWkE4u2VJagKn9B2zva2miRQ+LyvLLDwIDAQABo1MwUTAd
  BgNVHQ4EFgQUbcE9mpTkOK2ypIrURf+xYR08OAAwHwYDVR0jBBgwFoAUbcE9mpTk
  OK2ypIrURf+xYR08OAAwDwYDVR0TAQH/BAUwAwEB/zANBgkqhkiG9w0BAQsFAAOC
  AgEANTjx04NoiIyw9DyvszwRdrSGPO3dy1gk3jh+Du6Dpqqku3Mwr2ktaSCimeZS
  4zY4S5mRCgZRwDKu19z0tMwbVDyzHPFJx+wqBpZKkD1FvOPKjKLewtiW2z8AP/kF
  gl5UUNuwvGhOizazbvd1faQ8jMYoZKifM8On6IpFgqXCx98/GOWvnjn2t8YkMN3x
  blKVm5N7eGy9LeiGRoiCJqcyfGqdAdg+Z+J94AHEZb3OxG8uHLrtmz0BF3A+8V2H
  hofYI0spx5y9OcPin2yLm9DeCwWAA7maqdImBG/QpQCjcPW3Yzz9VytIMajPdnvd
  vbJF5GZNj7ods1AykCCJjGy6n9WCf3a4VLnZWtUTbtz0nrIjJjsdlXZqby5BCF0G
  iqWbg0j8onl6kmbMAhssRTlvL8w90F1IK3Hk+lz0Qy8rqZX2ohObtEYGMIAOdFJ1
  iPQrbksXOBpZNtm1VAved41sYt1txS2WZQgfklIXOhNOu4r32ZGKas4EJml0l0wL
  2P65PkPEa7AOeqwP0y6eGoNG9qFSl+yArycZGWudp88977H6CcdkdEcQzmjg5+TD
  9GHm3drUYGqBJDvIemQaXfnwy9Gxx+oBDpXLXOuo+edK812zh/q7s2FELfH5ZieE
  Q3dIH8UGsnjYxv8G3O23cYKZ1U0iiu9QvPRFm0F8JuFZqLQ=
  -----END CERTIFICATE-----
EOF

Before we can create the ignition file from the install-config.yaml we need to set the image release override variable.  We do this because all of this work is currently done on a X86 host but we are trying to generate a ignition file for an aarch64 host.   To set the image release override we will simply curl the aarch64 4.9.0-rc.2 release text and grab the quay release line:

$ export OPENSHIFT_INSTALL_RELEASE_IMAGE_OVERRIDE=$(curl -s https://mirror.openshift.com/pub/openshift-v4/aarch64/clients/ocp/4.9.0-rc.2/release.txt| grep 'Pull From: quay.io' | awk -F ' ' '{print $3}' | xargs)
$ echo $OPENSHIFT_INSTALL_RELEASE_IMAGE_OVERRIDE
quay.io/openshift-release-dev/ocp-release@sha256:edd47e590c6320b158a6a4894ca804618d3b1e774988c89cd988e8a841cb5f3c

Once we have the install-config.yaml and the image release override variable set we can use the openshift-install binary to generate a singe node openshift ignition config:

$ ./openshift-install --dir=./ create single-node-ignition-config
INFO Consuming Install Config from target directory 
WARNING Making control-plane schedulable by setting MastersSchedulable to true for Scheduler cluster settings 
WARNING Found override for release image. Please be warned, this is not advised 
INFO Single-Node-Ignition-Config created in: . and auth 
$ ls -lart
total 1017468
-rwxr-xr-x.  1 bschmaus bschmaus    7649968 Apr 27 00:49 coreos-installer
-rw-rw-r--.  1 bschmaus bschmaus 1031798784 Jul 22 13:10 rhcos-live.aarch64.iso
-rw-r--r--.  1 bschmaus bschmaus       3667 Sep 15 10:35 install-config.yaml.save
drwx------. 27 bschmaus bschmaus       8192 Sep 15 10:39 ..
drwxr-x---.  2 bschmaus bschmaus         50 Sep 15 10:45 auth
-rw-r-----.  1 bschmaus bschmaus     284253 Sep 15 10:45 bootstrap-in-place-for-live-iso.ign
-rw-r-----.  1 bschmaus bschmaus    1865601 Sep 15 10:45 .openshift_install_state.json
-rw-rw-r--.  1 bschmaus bschmaus     213442 Sep 15 10:45 .openshift_install.log
-rw-r-----.  1 bschmaus bschmaus         98 Sep 15 10:45 metadata.json
drwxrwxr-x.  3 bschmaus bschmaus        247 Sep 15 10:45 .

Now lets take that bootstrap-in-place-for-live-iso.ign config we generated and use the coreos-installer to embed it into the rhcos live iso image.  There will be no output upon completion so I usually echo the $? to confirm it ended with a good exit status.

$ ./coreos-installer iso ignition embed -fi bootstrap-in-place-for-live-iso.ign rhcos-live.aarch64.iso
$ echo $?
0

Now that the rhcos live iso image has the ignition file embedded we can write the image to a USB device: 

$ sudo dd if=./rhcos-live.aarch64.iso of=/dev/sda bs=8M status=progress oflag=direct
[sudo] password for bschmaus: 
948783104 bytes (949 MB, 905 MiB) copied, 216 s, 4.4 MB/s
113+1 records in
113+1 records out
948783104 bytes (949 MB, 905 MiB) copied, 215.922 s, 4.4 MB/s

Once the USB device is written take the USB and connect it to the Nvidia Jetson AGX and boot from it.  Keep in mind during the first boot of the Jetson I had to hit the ESC key to get access to the device manager to tell it to boot from the ISO.  Then once the system reboots again I had to go back into the device manager to boot from my NVMe device.  After that the system will boot from the NMVe until the next time I want to install from the ISO again.  This is more a Jetson nuance then OCP issue.

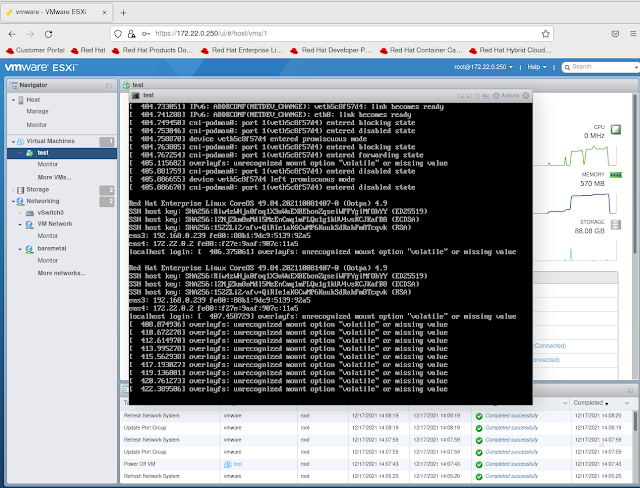
Once the system has rebooted the first time and if the ignition file was embedded without errors we should be able to login using the core user and associated key that was set in the install-config.yaml we used.   Once inside the node we should be able to use crictl ps to confirm containers are being started:

$ ssh core@192.168.0.47
Red Hat Enterprise Linux CoreOS 49.84.202109152147-0
  Part of OpenShift 4.9, RHCOS is a Kubernetes native operating system
  managed by the Machine Config Operator (`clusteroperator/machine-config`).

WARNING: Direct SSH access to machines is not recommended; instead,
make configuration changes via `machineconfig` objects:
  https://docs.openshift.com/container-platform/4.9/architecture/architecture-rhcos.html

---
Last login: Fri Sep 17 20:26:28 2021 from 10.0.0.152
[core@master-0 ~]$ sudo crictl ps
CONTAINER           IMAGE                                                                                                                    CREATED              STATE               NAME                             ATTEMPT             POD ID
f022aab7d2bd2       4e462838cdd7a580f875714d898aa392db63aefa2201141eca41c49d976f0965                                                         3 seconds ago        Running             network-operator                 0                   b89d47c2e53c9
c65fe3bd5a27c       quay.io/openshift-release-dev/ocp-v4.0-art-dev@sha256:8ad7f6aa04f25db941d5364fe2826cc0ed8c78b0f6ecba2cff660fab2b9327c7   About a minute ago   Running             cluster-policy-controller        0                   0df63b1ad8da3
7c5ea2f9f3ce0       quay.io/openshift-release-dev/ocp-v4.0-art-dev@sha256:efec74e2c00bca3688268eca7a256d865935c73b0ad0da4d5a9ceb126411ee1e   About a minute ago   Running             kube-apiserver-insecure-readyz   0                   f19feea00d442
c8665a708e33c       055d6dcd87c13fc04afd196253127c33cd86e4e0202e6798ce5b7136de56b206                                                         About a minute ago   Running             kube-apiserver                   0                   f19feea00d442
af8c8be71a74f       quay.io/openshift-release-dev/ocp-v4.0-art-dev@sha256:0d496e5f28b2d9f9bb507eb6b2a0544e46f973720bc98511bf4d05e9c81dc07a   About a minute ago   Running             kube-controller-manager          0                   0df63b1ad8da3
5c7fc277712f9       quay.io/openshift-release-dev/ocp-v4.0-art-dev@sha256:0d496e5f28b2d9f9bb507eb6b2a0544e46f973720bc98511bf4d05e9c81dc07a   About a minute ago   Running             kube-scheduler                   0                   41d530f654838
98b0faec9e0cd       quay.io/openshift-release-dev/ocp-v4.0-art-dev@sha256:81262ae10274989475617ac492361c3bc8853304fb409057e75d94c3eba18e48   About a minute ago   Running             etcd                             0                   f553fa481d714
[core@master-0 ~]$ uname -a
Linux master-0.kni7.schmaustech.com 4.18.0-305.19.1.el8_4.aarch64 #1 SMP Mon Aug 30 07:17:58 EDT 2021 aarch64 aarch64 aarch64 GNU/Linux

Further once we have confirmed containers are starting we can also use the kubeconfig and show the node state:

$ export KUBECONFIG=~/ocp/auth/kubeconfig 
$ ./oc get nodes -o wide
NAME                           STATUS ROLES         AGE   VERSION                INTERNAL-IP    EXTERNAL-IP   OS-IMAGE                                                       KERNEL-VERSION                  CONTAINER-RUNTIME
master-0.kni7.schmaustech.com  Ready  master,worker 12m   v1.22.0-rc.0+75ee307   192.168.0.47   <none>        Red Hat Enterprise Linux CoreOS 49.84.202109152147-0 (Ootpa)   4.18.0-305.19.1.el8_4.aarch64   cri-o://1.22.0-71.rhaos4.9.gitd54f8e1.el8
Now we can get the cluster operator states with the oc command to confirm when installation has completed.  If there are still False's under AVAILABLE then the installation is still progressing:

$ ./oc get co
NAME                                       VERSION      AVAILABLE   PROGRESSING   DEGRADED   SINCE   MESSAGE
authentication                             4.9.0-rc.2   False       False         True       12m     OAuthServerRouteEndpointAccessibleControllerAvailable: route.route.openshift.io "oauth-openshift" not found...
baremetal                                  4.9.0-rc.2   True        False         False      34s     
cloud-controller-manager                   4.9.0-rc.2   True        False         False      31s     
cloud-credential                           4.9.0-rc.2   True        False         False      11m     
cluster-autoscaler                                                                                   
config-operator                            4.9.0-rc.2   True        False         False      12m     
console                                    4.9.0-rc.2   Unknown     False         False      8s      
csi-snapshot-controller                    4.9.0-rc.2   True        False         False      12m     
dns                                        4.9.0-rc.2   True        False         False      109s    
etcd                                       4.9.0-rc.2   True        False         False      6m20s   
image-registry                                                                                       
ingress                                                 Unknown     True          Unknown    15s     Not all ingress controllers are available.
insights                                   4.9.0-rc.2   True        True          False      32s     Initializing the operator
kube-apiserver                             4.9.0-rc.2   True        False         False      96s     
kube-controller-manager                    4.9.0-rc.2   True        False         False      5m3s    
kube-scheduler                             4.9.0-rc.2   True        False         False      6m14s   
kube-storage-version-migrator              4.9.0-rc.2   True        False         False      12m     
machine-api                                4.9.0-rc.2   True        False         False      1s      
machine-approver                           4.9.0-rc.2   True        False         False      55s     
machine-config                             4.9.0-rc.2   True        False         False      38s     
marketplace                                4.9.0-rc.2   True        False         False      11m     
monitoring                                              Unknown     True          Unknown    12m     Rolling out the stack.
network                                    4.9.0-rc.2   True        False         False      13m     
node-tuning                                4.9.0-rc.2   True        False         False      11s     
openshift-apiserver                        4.9.0-rc.2   False       False         False      105s    APIServerDeploymentAvailable: no apiserver.openshift-apiserver pods available on any node....
openshift-controller-manager               4.9.0-rc.2   True        False         False      75s     
openshift-samples                                                                                    
operator-lifecycle-manager                 4.9.0-rc.2   True        False         False      24s     
operator-lifecycle-manager-catalog         4.9.0-rc.2   True        True          False      21s     Deployed 0.18.3
operator-lifecycle-manager-packageserver                False       True          False      26s     
service-ca                                 4.9.0-rc.2   True        False         False      12m     
storage                                    4.9.0-rc.2   True        False         False      30s    

Finally though after about 30 - 60 minutes we can finally see our single node cluster has completed installation:

$ ./oc get co
NAME                                       VERSION      AVAILABLE   PROGRESSING   DEGRADED   SINCE   MESSAGE
authentication                             4.9.0-rc.2   True        False         False      5m3s    
baremetal                                  4.9.0-rc.2   True        False         False      8m24s   
cloud-controller-manager                   4.9.0-rc.2   True        False         False      8m21s   
cloud-credential                           4.9.0-rc.2   True        False         False      19m     
cluster-autoscaler                         4.9.0-rc.2   True        False         False      7m35s   
config-operator                            4.9.0-rc.2   True        False         False      20m     
console                                    4.9.0-rc.2   True        False         False      4m54s   
csi-snapshot-controller                    4.9.0-rc.2   True        False         False      19m     
dns                                        4.9.0-rc.2   True        False         False      9m39s   
etcd                                       4.9.0-rc.2   True        False         False      14m     
image-registry                             4.9.0-rc.2   True        False         False      4m52s   
ingress                                    4.9.0-rc.2   True        False         False      7m4s    
insights                                   4.9.0-rc.2   True        False         False      8m22s   
kube-apiserver                             4.9.0-rc.2   True        False         False      9m26s   
kube-controller-manager                    4.9.0-rc.2   True        False         False      12m     
kube-scheduler                             4.9.0-rc.2   True        False         False      14m     
kube-storage-version-migrator              4.9.0-rc.2   True        False         False      20m     
machine-api                                4.9.0-rc.2   True        False         False      7m51s   
machine-approver                           4.9.0-rc.2   True        False         False      8m45s   
machine-config                             4.9.0-rc.2   True        False         False      8m28s   
marketplace                                4.9.0-rc.2   True        False         False      19m     
monitoring                                 4.9.0-rc.2   True        False         False      2m24s   
network                                    4.9.0-rc.2   True        False         False      21m     
node-tuning                                4.9.0-rc.2   True        False         False      8m1s    
openshift-apiserver                        4.9.0-rc.2   True        False         False      5m9s    
openshift-controller-manager               4.9.0-rc.2   True        False         False      9m5s    
openshift-samples                          4.9.0-rc.2   True        False         False      6m57s   
operator-lifecycle-manager                 4.9.0-rc.2   True        False         False      8m14s   
operator-lifecycle-manager-catalog         4.9.0-rc.2   True        False         False      8m11s   
operator-lifecycle-manager-packageserver   4.9.0-rc.2   True        False         False      7m49s   
service-ca                                 4.9.0-rc.2   True        False         False      20m     
storage                                    4.9.0-rc.2   True        False         False      8m20s 

And from the web console:


Wednesday, September 15, 2021

Deploy Disconnected Single Node OpenShift via OpenShift Installer


Deploying a single node OpenShift via the Assisted Installer has made it very easy to stand up a one node cluster.  However this means having nodes that have connectivity to the internet.  But what if the environment is disconnected?   In the following blog I will show how one can use the openshift-install binary to deploy a single node OpenShift that is in a disconnected environment without the assisted installer.

Before we begin lets cover what this blog already assumes exists as prerequisites:
  • Podman, the oc binary and the openshift-install binary already exist on the system
  • A disconnected registry is already configured and has the mirrored contents of the images for a given OpenShift release.   
  • A physical baremetal node with the ability to boot an ISO image
  • DNS entries for basic baremetal IPI requirements exist. My environment is below:
master-0.kni20.schmaustech.com IN A 192.168.0.210
*.apps.kni20.schmaustech.com IN A 192.168.0.210
api.kni20.schmaustech.com IN A 192.168.0.210
api-int.kni20.schmaustech.com   IN A 192.168.0.210

First lets verify the version of OpenShift we will be deploying by looking at the output of the oc version and openshift-install version:


$ oc version
Client Version: 4.8.12
$ ./openshift-install version
./openshift-install 4.8.12
built from commit 450e95767d89f809cb1afe5a142e9c824a269de8
release image quay.io/openshift-release-dev/ocp-release@sha256:c3af995af7ee85e88c43c943e0a64c7066d90e77fafdabc7b22a095e4ea3c25a


Looks like we will be deploying a version of 4.8.12.   Ensure the disconnected registry being used has the images for 4.8.12 mirrored.  If not use procedure like I have used in one of my previous blogs to mirror the 4.8.12 images.

Now lets pull down a few files we will need for our deployment iso.   We need to pull down both the coreos-installer and the rhcos live iso:

$ wget https://mirror.openshift.com/pub/openshift-v4/clients/coreos-installer/v0.8.0-3/coreos-installer
--2021-09-15 10:10:26--  https://mirror.openshift.com/pub/openshift-v4/clients/coreos-installer/v0.8.0-3/coreos-installer
Resolving mirror.openshift.com (mirror.openshift.com)... 54.172.173.155, 54.173.18.88
Connecting to mirror.openshift.com (mirror.openshift.com)|54.172.173.155|:443... connected.
HTTP request sent, awaiting response... 200 OK
Length: 7649968 (7.3M)
Saving to: ‘coreos-installer’

coreos-installer                                     100%[=====================================================================================================================>]   7.29M  8.83MB/s    in 0.8s    

2021-09-15 10:10:27 (8.83 MB/s) - ‘coreos-installer’ saved [7649968/7649968]

$ wget https://mirror.openshift.com/pub/openshift-v4/dependencies/rhcos/latest/4.8.2/rhcos-4.8.2-x86_64-live.x86_64.iso
--2021-09-15 10:10:40--  https://mirror.openshift.com/pub/openshift-v4/dependencies/rhcos/latest/4.8.2/rhcos-4.8.2-x86_64-live.x86_64.iso
Resolving mirror.openshift.com (mirror.openshift.com)... 54.172.173.155, 54.173.18.88
Connecting to mirror.openshift.com (mirror.openshift.com)|54.172.173.155|:443... connected.
HTTP request sent, awaiting response... 200 OK
Length: 1031798784 (984M) [application/octet-stream]
Saving to: ‘rhcos-4.8.2-x86_64-live.x86_64.iso’

rhcos-4.8.2-x86_64-live.x86_64.iso                   100%[=====================================================================================================================>] 984.00M  11.2MB/s    in 93s     

2021-09-15 10:12:13 (10.6 MB/s) - ‘rhcos-4.8.2-x86_64-live.x86_64.iso’ saved [1031798784/1031798784]


Set the execution bit on the coreos-installer which is a utility to embed the ignition file we will generate:

$ chmod 755 coreos-installer

Lets go ahead now and create an install-config.yaml for our single node deployment.  Notice some of the differences in this install-config.yaml.  Specifically we have no worker nodes defined, one master node defined and then we have the BootstrapInPlace section which tells us to use the sda disk in the node.  We also have our imageContentSources which tells the installer to use the registry mirror.

$ cat << EOF > install-config.yaml
apiVersion: v1beta4
baseDomain: schmaustech.com
metadata:
  name: kni20
networking:
  networkType: OVNKubernetes
  machineCIDR: 192.168.0.0/24
compute:
- name: worker
  replicas: 0
controlPlane:
  name: master
  replicas: 1
platform:
  none: {}
BootstrapInPlace:
  InstallationDisk: /dev/sda
pullSecret: '{ "auths": { "rhel8-ocp-auto.schmaustech.com:5000": {"auth": "ZHVtbXk6ZHVtbXk=","email": "bschmaus@schmaustech.com" } } }'
sshKey: 'ssh-rsa AAAAB3NzaC1yc2EAAAADAQABAAACAQDP+5QkRCiuhsYItXj7DzLcOIs2RbCgpMzDtPlt/hfLnDkLGozYIFapMp+o4l+6ornbZ3L+hYE0T8SyvyYVWfm1XpPcVgUIW6qp7yfEyTSRhpGnoY74PD33FIf6BtU2HoFLWjQcE6OrQOF0wijI3fgL0jSzvAxvYoXU/huMx/kI2jBcWEq5cADRfvpeYXhVEJLrIIOepoAZE1syaPT7jQEoLDfvxrDZPKObCOI2vzLiAQXI7gK1uc9YDb6IEA/4Ik4eV2R1+VCgKhgk5RUqn69+8a1o783g1tChKuLwA4K9lyEAbFBwlHMctfNOLeC1w+bYpDXH/3GydcYfq79/18dVd+xEUlzzC+2/qycWG36C1MxUZa2fXvSRWLnpkLcxtIes4MikFeIr3jkJlFUzITigzvFrKa2IKaJzQ53WsE++LVnKJfcFNLtWfdEOZMowG/KtgzSSac/iVEJRM2YTIJsQsqhhI4PTrqVlUy/NwcXOFfUF/NkF2deeUZ21Cdn+bKZDKtFu2x+ujyAWZKNq570YaFT3a4TrL6WmE9kdHnJOXYR61Tiq/1fU+y0fv1d0f1cYr4+mNRCGIZoQOgJraF7/YluLB23INkJgtbah/0t1xzSsQ59gzFhRlLkW9gQDekj2tOGJmZIuYCnTXGiqXHnri2yAPexgRiaFjoM3GCpsWw== bschmaus@bschmaus.remote.csb'
imageContentSources:
- mirrors:
  - rhel8-ocp-auto.schmaustech.com:5000/ocp4/openshift4
  source: quay.io/openshift-release-dev/ocp-release
- mirrors:
  - rhel8-ocp-auto.schmaustech.com:5000/ocp4/openshift4
  source: quay.io/openshift-release-dev/ocp-v4.0-art-dev
additionalTrustBundle: |
  -----BEGIN CERTIFICATE-----
  MIIF7zCCA9egAwIBAgIUeecEs+U5psgJ0aFgc4Q5dGVrAFcwDQYJKoZIhvcNAQEL
  BQAwgYYxCzAJBgNVBAYTAlVTMRYwFAYDVQQIDA1Ob3J0aENhcm9saW5hMRAwDgYD
  VQQHDAdSYWxlaWdoMRAwDgYDVQQKDAdSZWQgSGF0MRIwEAYDVQQLDAlNYXJrZXRp
  bmcxJzAlBgNVBAMMHnJoZWw4LW9jcC1hdXRvLnNjaG1hdXN0ZWNoLmNvbTAeFw0y
  MTA2MDkxMDM5MDZaFw0yMjA2MDkxMDM5MDZaMIGGMQswCQYDVQQGEwJVUzEWMBQG
  A1UECAwNTm9ydGhDYXJvbGluYTEQMA4GA1UEBwwHUmFsZWlnaDEQMA4GA1UECgwH
  UmVkIEhhdDESMBAGA1UECwwJTWFya2V0aW5nMScwJQYDVQQDDB5yaGVsOC1vY3At
  YXV0by5zY2htYXVzdGVjaC5jb20wggIiMA0GCSqGSIb3DQEBAQUAA4ICDwAwggIK
  AoICAQC9exAg3Ie3N3mkrQKseyri1VP2IPTc+pUEiVCPisIQAhRUfHhPR1HT7EF7
  SwaxrWjpfh9aYBPDEF3uLFQvzDEJWCh5PF55jwn3aABFGKEhfVBKd+es6nXnYaCS
  8CgLS2qM9x4WiuZxrntfB16JrjP+CrTvlAbE4DIMlDQLgh8+hDw9VPlbzY+MI+WC
  cYues1Ne+JZ5dZcKmCZ3zrVToPjreWZUuhSygci2xIQZxwWNmTvAgi+CAiQZS7VF
  RmKjj2H/o/d3I+XSS2261I8aXCAw4/3vaM9aci0eHeEhLIMrhv86WycOjcYL1Z6R
  n55diwDTSyrTo/B4zsQbmYUc8rP+pR2fyRJEGFVJ4ejcj2ZF5EbgUKupyU2gh/qt
  QeYtJ+6uAr9S5iQIcq9qvD9nhAtm3DnBb065X4jVPl2YL4zsbOS1gjoa6dRbFuvu
  f3SdsbQRF/YJWY/7j6cUaueCQOlXZRNhbQQHdIdBWFObw0QyyYtI831ue1MHPG0C
  nsAriPOkRzBBq+BPmS9CqcRDGqh+nd9m9UPVDoBshwaziSqaIK2hvfCAVb3BPJES
  CXKuIaP2IRzTjse58aAzsRW3W+4e/v9fwAOaE8nS7i+v8wrqcFgJ489HnVq+kRNc
  VImv5dBKg2frzXs1PpnWkE4u2VJagKn9B2zva2miRQ+LyvLLDwIDAQABo1MwUTAd
  BgNVHQ4EFgQUbcE9mpTkOK2ypIrURf+xYR08OAAwHwYDVR0jBBgwFoAUbcE9mpTk
  OK2ypIrURf+xYR08OAAwDwYDVR0TAQH/BAUwAwEB/zANBgkqhkiG9w0BAQsFAAOC
  AgEANTjx04NoiIyw9DyvszwRdrSGPO3dy1gk3jh+Du6Dpqqku3Mwr2ktaSCimeZS
  4zY4S5mRCgZRwDKu19z0tMwbVDyzHPFJx+wqBpZKkD1FvOPKjKLewtiW2z8AP/kF
  gl5UUNuwvGhOizazbvd1faQ8jMYoZKifM8On6IpFgqXCx98/GOWvnjn2t8YkMN3x
  blKVm5N7eGy9LeiGRoiCJqcyfGqdAdg+Z+J94AHEZb3OxG8uHLrtmz0BF3A+8V2H
  hofYI0spx5y9OcPin2yLm9DeCwWAA7maqdImBG/QpQCjcPW3Yzz9VytIMajPdnvd
  vbJF5GZNj7ods1AykCCJjGy6n9WCf3a4VLnZWtUTbtz0nrIjJjsdlXZqby5BCF0G
  iqWbg0j8onl6kmbMAhssRTlvL8w90F1IK3Hk+lz0Qy8rqZX2ohObtEYGMIAOdFJ1
  iPQrbksXOBpZNtm1VAved41sYt1txS2WZQgfklIXOhNOu4r32ZGKas4EJml0l0wL
  2P65PkPEa7AOeqwP0y6eGoNG9qFSl+yArycZGWudp88977H6CcdkdEcQzmjg5+TD
  9GHm3drUYGqBJDvIemQaXfnwy9Gxx+oBDpXLXOuo+edK812zh/q7s2FELfH5ZieE
  Q3dIH8UGsnjYxv8G3O23cYKZ1U0iiu9QvPRFm0F8JuFZqLQ=
  -----END CERTIFICATE-----
EOF

Once we have the install-config.yaml created lets use the openshift-install binary to generate a singe node openshift ignition config:

$ ~/openshift-install --dir=./ create single-node-ignition-config
INFO Consuming Install Config from target directory 
WARNING Making control-plane schedulable by setting MastersSchedulable to true for Scheduler cluster settings 
INFO Single-Node-Ignition-Config created in: . and auth 
$ ls -lart
total 1017468
-rwxr-xr-x.  1 bschmaus bschmaus    7649968 Apr 27 00:49 coreos-installer
-rw-rw-r--.  1 bschmaus bschmaus 1031798784 Jul 22 13:10 rhcos-4.8.2-x86_64-live.x86_64.iso
-rw-r--r--.  1 bschmaus bschmaus       3667 Sep 15 10:35 install-config.yaml.save
drwx------. 27 bschmaus bschmaus       8192 Sep 15 10:39 ..
drwxr-x---.  2 bschmaus bschmaus         50 Sep 15 10:45 auth
-rw-r-----.  1 bschmaus bschmaus     284253 Sep 15 10:45 bootstrap-in-place-for-live-iso.ign
-rw-r-----.  1 bschmaus bschmaus    1865601 Sep 15 10:45 .openshift_install_state.json
-rw-rw-r--.  1 bschmaus bschmaus     213442 Sep 15 10:45 .openshift_install.log
-rw-r-----.  1 bschmaus bschmaus         98 Sep 15 10:45 metadata.json
drwxrwxr-x.  3 bschmaus bschmaus        247 Sep 15 10:45 .


Now lets take that bootstrap-in-place-for-live-iso.ign config we generated and use the coreos-installer to embed it into the rhcos live iso image.  There will be no output upon completion so I usually echo the $? to confirm it ended with a good exit status.

$ ./coreos-installer iso ignition embed -fi bootstrap-in-place-for-live-iso.ign rhcos-4.8.2-x86_64-live.x86_64.iso
$ echo $?
0

Since I am using a virtual machine as my single node openshift node I need to copy the boot iso over to my hypervisor host.  If this were a real baremetal server like Dell one might mount the iso image via virtual media or as another method write the iso to a USB device and physically plug it into the node being used for this singe node deployment.

$ scp rhcos-4.8.2-x86_64-live.x86_64.iso root@192.168.0.20:/var/lib/libvirt/images/
root@192.168.0.20's password: 
rhcos-4.8.2-x86_64-live.x86_64.iso                                                                                                                                               100%  984MB  86.0MB/s   00:11 

Once I have the live iso over on my hypervisor host I will use Virt-Manager to set the cdrom to boot from the live iso:

Next I will start the virtual machine.  If using a physical host power on the node.  The screen should be similar:


Once the virtual machine has booted we will see the console and login prompt.  After a few minutes the machine will reboot.


If the ignition file was embedded without errors we should be able to login using the core user and associated key that was set in the install-config.yaml we used.   Once inside the node we should be able to use crictl ps to confirm containers are being started:

$ ssh core@192.168.0.210
The authenticity of host '192.168.0.210 (192.168.0.210)' can't be established.
ECDSA key fingerprint is SHA256:B24X/7PH3+kGWwmUKPc/E+2Rg3YYsmYHISCOHfbGthg.
Are you sure you want to continue connecting (yes/no/[fingerprint])? yes
Warning: Permanently added '192.168.0.210' (ECDSA) to the list of known hosts.
Red Hat Enterprise Linux CoreOS 48.84.202109100857-0
  Part of OpenShift 4.8, RHCOS is a Kubernetes native operating system
  managed by the Machine Config Operator (`clusteroperator/machine-config`).

WARNING: Direct SSH access to machines is not recommended; instead,
make configuration changes via `machineconfig` objects:
  https://docs.openshift.com/container-platform/4.8/architecture/architecture-rhcos.html

---
[core@master-0 ~]$ sudo crictl ps
CONTAINER           IMAGE                                                                                                                    CREATED              STATE               NAME                                 ATTEMPT             POD ID
a3792d71875ab       aeee3c4eb8828bef375fa5f81bf524e84d12a0264c126b0f97703a3e5ebc06a8                                                         17 seconds ago       Running             sbdb                                 0                   4de60fd9cc622
733326d7246f8       dfd1e2430556eb4a9de83031a82c62c06debca6095dd63553ed38bd486374ac8                                                         17 seconds ago       Running             kube-rbac-proxy                      0                   4de60fd9cc622
7df7efd52c7f9       de195e3670ad1b3dd892d5a289aa83ce12122001faf02a56facb8fa4720ceaa3                                                         44 seconds ago       Running             kube-multus-additional-cni-plugins   0                   aab58f11b1f0a
ce602f830cb44       aeee3c4eb8828bef375fa5f81bf524e84d12a0264c126b0f97703a3e5ebc06a8                                                         48 seconds ago       Running             ovnkube-node                         0                   f0fea8120b806
d17912e8c762d       quay.io/openshift-release-dev/ocp-v4.0-art-dev@sha256:7b7edfdb1dd3510c1a8d74144ae89fbe61a28f519781088ead1cb5e560158657   48 seconds ago       Running             kube-rbac-proxy                      0                   f0fea8120b806
f6cf9e739714e       aeee3c4eb8828bef375fa5f81bf524e84d12a0264c126b0f97703a3e5ebc06a8                                                         49 seconds ago       Running             ovn-acl-logging                      0                   f0fea8120b806
232e663c0b190       quay.io/openshift-release-dev/ocp-v4.0-art-dev@sha256:03dc4dd87f6e52ad54718f31de9edfc763ce5a001d5bdff6c95fe85275fb64de   49 seconds ago       Running             northd                               0                   4de60fd9cc622
7b4b432b988d8       quay.io/openshift-release-dev/ocp-v4.0-art-dev@sha256:03dc4dd87f6e52ad54718f31de9edfc763ce5a001d5bdff6c95fe85275fb64de   49 seconds ago       Running             ovn-controller                       0                   f0fea8120b806
5596f6644e1bb       quay.io/openshift-release-dev/ocp-v4.0-art-dev@sha256:1fec937521df496277f7f934c079ebf48baccd8f76a5bfcc793e7c441976e6b5   About a minute ago   Running             kube-multus                          0                   7f4536275fb42
51b1c4da641f4       quay.io/openshift-release-dev/ocp-v4.0-art-dev@sha256:70ffc0ed147222ab1bea6207af5415f11450c86a9de2979285ba1324f6e904c2   About a minute ago   Running             network-operator                     0                   ea0f3c0bb9567
b4b46f8f5de1c       quay.io/openshift-release-dev/ocp-v4.0-art-dev@sha256:66fa2d7a5b2be88b76b5a8fa6f330bc64b57ce0fa9b8ea29e96a4c77df90f7cd   2 minutes ago        Running             kube-apiserver-insecure-readyz       0                   e3a4d81e4e99a
e49ce4745cefd       c7dbf8655b94a464b0aa15734fbd887bec8cdda46bbb3580954bf36961b4ac78                                                         2 minutes ago        Running             kube-controller-manager              1                   3cbc2d942afd8
7bd9f40dd40a3       c7dbf8655b94a464b0aa15734fbd887bec8cdda46bbb3580954bf36961b4ac78                                                         2 minutes ago        Running             kube-apiserver                       0                   e3a4d81e4e99a
e319800865018       quay.io/openshift-release-dev/ocp-v4.0-art-dev@sha256:80d0fcaf10fd289e31383062293cadb91ca6f7852a82f864c088679905f67859   2 minutes ago        Running             cluster-policy-controller            0                   3cbc2d942afd8
d1e26854fc700       quay.io/openshift-release-dev/ocp-v4.0-art-dev@sha256:e9de94a775df9cd6f86712410794393aa58f07374f294ba5a7b503f9fb23cf42   2 minutes ago        Running             kube-scheduler                       0                   0ae8507e3280a
e95cef37125c4       quay.io/openshift-release-dev/ocp-v4.0-art-dev@sha256:622d9bb3fe4e540054f54ec260a7e3e4f16892260658dbe32ee4750c27a94158   2 minutes ago        Running             etcd                                 0                   dcd694d4f9317
[core@master-0 ~]$ 


Further once we have confirmed containers are starting we can also use the kubeconfig and show the node state:

$ export KUBECONFIG=./auth/kubeconfig 
$ oc get nodes
NAME                             STATUS   ROLES           AGE   VERSION
master-0.kni20.schmaustech.com   Ready    master,worker   21m   v1.21.1+d8043e1

Now we can get the cluster operator states with the oc command to confirm when installation has completed.  If there are still False's under AVAILABLE then the installation is still progressing:

$ oc get co
NAME                                       VERSION   AVAILABLE   PROGRESSING   DEGRADED   SINCE
authentication                             4.8.12    False       True          False      17m
baremetal                                  4.8.12    True        False         False      11m
cloud-credential                           4.8.12    True        False         False      3m37s
cluster-autoscaler                         4.8.12    True        False         False      11m
config-operator                            4.8.12    True        False         False      17m
console                                    4.8.12    False       True          False      7m35s
csi-snapshot-controller                    4.8.12    True        False         False      7m56s
dns                                        4.8.12    True        False         False      9m2s
etcd                                       4.8.12    True        False         False      12m
image-registry                             4.8.12    True        False         False      7m48s
ingress                                    4.8.12    True        False         False      8m53s
insights                                   4.8.12    True        False         False      12m
kube-apiserver                             4.8.12    True        True          False      7m53s
kube-controller-manager                    4.8.12    True        False         False      10m
kube-scheduler                             4.8.12    True        False         False      11m
kube-storage-version-migrator              4.8.12    True        False         False      17m
machine-api                                4.8.12    True        False         False      11m
machine-approver                           4.8.12    True        False         False      16m
machine-config                                                   True                     
marketplace                                4.8.12    True        False         False      16m
monitoring                                 4.8.12    True        False         False      6m18s
network                                    4.8.12    True        False         False      17m
node-tuning                                4.8.12    True        False         False      11m
openshift-apiserver                        4.8.12    True        False         False      7m45s
openshift-controller-manager               4.8.12    True        False         False      7m53s
openshift-samples                          4.8.12    True        False         False      8m
operator-lifecycle-manager                 4.8.12    True        False         False      17m
operator-lifecycle-manager-catalog         4.8.12    True        False         False      12m
operator-lifecycle-manager-packageserver   4.8.12    True        False         False      8m56s
service-ca                                 4.8.12    True        False         False      17m
storage                                    4.8.12    True        False         False      11m

Finally though after about 30 - 60 minutes we can finally see our single node cluster has completed installation:

$ oc get co
NAME                                       VERSION   AVAILABLE   PROGRESSING   DEGRADED   SINCE
authentication                             4.8.12    True        False         False      6m55s
baremetal                                  4.8.12    True        False         False      19m
cloud-credential                           4.8.12    True        False         False      10m
cluster-autoscaler                         4.8.12    True        False         False      18m
config-operator                            4.8.12    True        False         False      24m
console                                    4.8.12    True        False         False      7m1s
csi-snapshot-controller                    4.8.12    True        False         False      15m
dns                                        4.8.12    True        False         False      16m
etcd                                       4.8.12    True        False         False      19m
image-registry                             4.8.12    True        False         False      15m
ingress                                    4.8.12    True        False         False      16m
insights                                   4.8.12    True        False         False      19m
kube-apiserver                             4.8.12    True        False         False      15m
kube-controller-manager                    4.8.12    True        False         False      18m
kube-scheduler                             4.8.12    True        False         False      18m
kube-storage-version-migrator              4.8.12    True        False         False      24m
machine-api                                4.8.12    True        False         False      19m
machine-approver                           4.8.12    True        False         False      24m
machine-config                             4.8.12    True        False         False      5m45s
marketplace                                4.8.12    True        False         False      24m
monitoring                                 4.8.12    True        False         False      13m
network                                    4.8.12    True        False         False      25m
node-tuning                                4.8.12    True        False         False      19m
openshift-apiserver                        4.8.12    True        False         False      15m
openshift-controller-manager               4.8.12    True        False         False      15m
openshift-samples                          4.8.12    True        False         False      15m
operator-lifecycle-manager                 4.8.12    True        False         False      24m
operator-lifecycle-manager-catalog         4.8.12    True        False         False      19m
operator-lifecycle-manager-packageserver   4.8.12    True        False         False      16m
service-ca                                 4.8.12    True        False         False      24m
storage                                    4.8.12    True        False         False      19m